


This FAQ pertains to the use of embossing powder adhered to a surface with embossing ink then heated to the point where it melts. This isn’t referring to paper or metal embossing, which is a whole other discussion. If we’re on the same page, literally & figuratively, you’ve come to the right place! Let’s get to it.
Question: What supplies do I need?
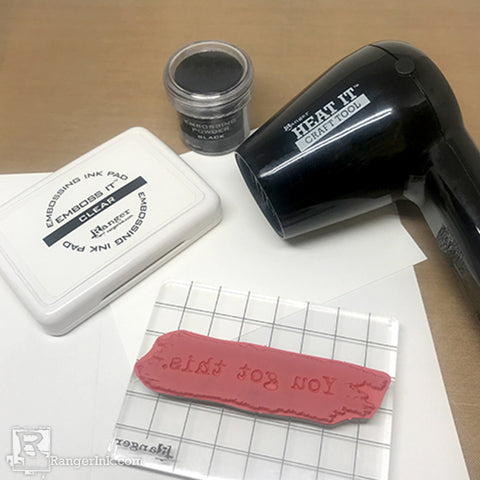
Answer: The most basic embossing supplies: a clear stamp or cling rubber with a stamping block or a wood mounted rubber stamp, an embossing ink pad, embossing powder, paper to emboss onto, a heat tool, a scrap piece of paper and a re-useable protective sheet (while useful is not strictly needed). Last, a hard, flat surface to stamp on.
Anti-Grief Tip: Please do not emboss on a plastic table or one that would be warped or destroyed by heat.
Now that you know what tools to use, let’s do this!
Question: How do I Emboss?
Answer:
Step 1: Fold a piece of scrap paper in half & then open it up again. You’ll use this later. Open your jar of embossing powder. You’ll want to work as quickly as possible after your image is stamped.

Step 2: Ink up your stamp with embossing Ink.

Step 3: Stamp it onto your ‘good’ paper.

Step 4: Pour your embossing powder onto the wet ink. Tilt your paper around so that the powder covers the whole stamped area.
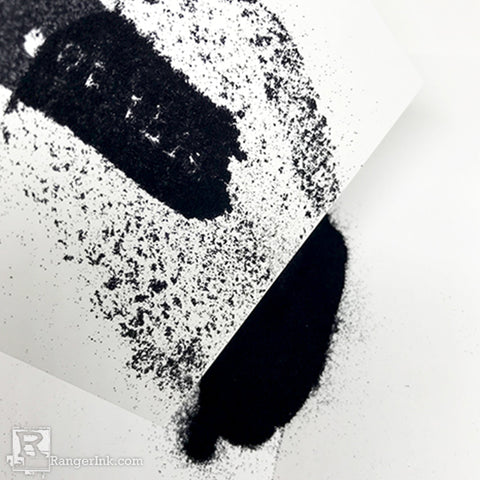
Step 5: With your scrap paper underneath, position your just powdered paper above and gently tip your paper so that the excess embossing powder falls onto the scrap beneath.

Step 6: Use the fold to quickly channel & slide the excess embossing powder back into the jar & secure the lid.

Step 7: Using your Heat It Tool, heat the embossing powder. Most powders will start to get shiny when they melt. Watch closely and move your Heat Tool slowly to adjacent areas that have not melted yet. Make sure to melt all of the powder. Don’t keep heating after it has all melted. At this point it will start to melt into the paper and the image will be less crisp. Let it cool completely. Don’t let anything touch it until it does, or it will smear.
Tip: Although not necessary, lifting your paper off the surface while heating the embossing powder will speed up the embossing process. It takes less time to heat the paper and the powder to the melting point than it does to heat the paper, powder and the table it is on, to that point. Please keep your fingers away from the heat source. Hold the paper at an edge far away from the stamped area.
Nerdy but useful facts:
Embossing powders have different melting points. That’s why some powders melt faster than others.
Size matters. Larger granules of embossing powder will take longer to melt than Super Fine Detail Powders.
Question: Excess powder is sticking. How do I get it off?

Answer: You can take a couple of steps to prevent it from happening:
- Wash your hands before touching the paper to be embossed. Oil from your skin can get onto the paper and embossing powder will stick to it.
- You can also use the Ranger Anti-Static Pouch before stamping your image. In most cases this will prevent it from happening at all.
If you still get some powder that sticks:
- You can use a fine, pointed brush to remove the granules.
- You can tap or flick the paper from the back and the excess powder pops off. This is a controversial method and everyone seems to have their own strong opinion. A light touch is needed. If you flick it too hard you can remove powder from the stamped image & have to re-powder, defeating the purpose. Try it and see if it’s for you.
Question: Why is my embossing powder not sticking?

Answer:
- The stamp may have not been fully inked or maybe the surface you stamped it on is not flat & even. You can use a Ranger Emboss it™ Embossing Pen to fill in areas your stamping missed.
- The problem may also be a dry embossing pad. Just re-ink the pad with the appropriate re-inker and you’re good to go.
- The embossing powder needs to reach its melting temperature. If it doesn’t, it won’t adhere to the paper. See the next question.
Question: Can I use a hair dryer to emboss?

Answer: Nope. A hair dryer doesn’t get hot enough and it would blow the powder right off the paper.
The Heat it Craft Tool™ is great for embossing. It has a gentle air flow that doesn’t blow the powder away, even when using Super Fine Detail Powders or embossing powders that contain fine glitter. It reaches the temperature slowly, so there is less chance of over-heating or burning the powder. A bonus feature is that it’s quiet. Which is helpful if you’re making a video, tele-crafting or maybe you just don’t appreciate loud noises.
Tip: Know your Heat Tool. Each tool has a ‘sweet spot’, an area that heats up the fastest and stays the hottest. If you take note of this spot on your particular Heat Tool you can use your tool in the most effective way.
Question: How can I tell when the embossing is done?
Answer: Emboss in a well-lit area & look for changes. Tilting your head to peek between the Heat Tool & your paper can sometimes help. Depending on the finish of your chosen embossing powder, you’ll be able to see the powder melt & get shiny. Matte powders also change but it is a lot more subtle. With practice, keen observation skills are usually quickly acquired.
Question: What are Super Fine Detail Powders & how are they different than regular embossing powders?

Answer: Super Fine Detail Powders have a finer granule size that the regular versions of the powders. And as the name suggests you can get ‘super fine details’ in your embossing.
Question: Why are there clear, tinted and black embossing Inks & pens?

Answer: Each kind serves a different purpose.
The Tinted is for the newcomer to embossing. It helps you see exactly where and how much ink is deposited on the paper. This way it’s easy to fill in areas your stamping missed using a matching embossing pen. Or if the stamping is well inked, to proceed confidently knowing your embossing powder will stick and is not missing ink any areas.
The Clear is for someone who has more experience with embossing and has developed those keen observation skills mentioned earlier.
The Black is for specialty powders that benefit from a dark area beneath the powder to delineate them from the paper. Pearl Embossing Powders look great on black. You can also use Clear or Frosted Crystal Embossing Powder on top to give your writing tactile appeal. A special bonus feature of the black pen is that you can use it with Perfect Pearls™ mica powders for a different kind of shine.
Tip: Try your embossing powders with tinted or black embossing Inks or pens. The tinted and black will change the look of any clear, pearl, transparent or semi-transparent embossing powder.
Questions: How do I use Embossing Pens?

Answer: You can write and draw anything & then emboss it. It’s essentially embossing ink in a pen! Embossing Pens are great, as mentioned previously, for touching up unevenly stamped images. You can even color in or draw designs over previously embossed images, add a different embossing powder and emboss again. You can use multiple colors of embossing powders and create multiple effects & layers!
Question: Do I have to use embossing ink? Or can I use a different Ink to emboss over?

Answer: You can use different inks. It all depends on whether the ink will stay wet long enough for the embossing powder to adhere to the stamping. Inks that take longer to dry are great. Experiment with different types of inks to find out. If the paper you are using is very porous, the ink may be absorbed into the paper too quickly for you to get the powder to adhere to it. Archival Ink™ is great to use if you work quickly. You can use it to stamp out an image then partially cover an image with a different colored embossing powder. Emboss as usual and you will have a two-tone image!
Tip: You can use colored inks in conjunction with clear & it will look like you have several colors of embossing powder.
Anti-Grief Tip:
Before doing a large number of cards, for example, invitations, experiment first. Make sure the paper and the embossing powder work well together, giving you the look you are after. For example, transparent colors on a black cardstock would give you a glossy image, but if a bright, bold color is what you’re looking for it wouldn’t fill the bill. Opaque powders on black would give you bold contrast.
Question: How many different kinds of embossing powders are there?

Answer: An unbelievable amount and there are more being developed each day! Embossing powders are diverse. Depending on the powder being used, the finish can be smooth, matte, bumpy, shimmery, sparkly & more. You can achieve a myriad of different looks, from opaque to transparent as well as a mixture of both. We’ll go into more detail in the next in the next installment.

Super Important Fact: We weren’t born knowing how to emboss. Please be kind yourself. It usually takes a bit of practice to become proficient at embossing. Experiment with different combinations of embossing powders, Inks, stamps & papers. Remember to have fun!
Stay Tuned, more to come… Advanced Embossing FAQ
